

Are you considering getting braces but feeling overwhelmed by the process? Taking the step toward a straighter smile doesn’t have to be intimidating when you know what to expect.
The journey to getting braces typically begins with an initial consultation with an orthodontist who’ll evaluate your teeth and discuss treatment options. From there, you’ll move through several key appointments—from having molds made of your teeth to the actual braces placement procedure. Understanding each phase of the process can help ease any anxiety and prepare you for your orthodontic transformation.
Understanding the Braces Journey
The orthodontic treatment process follows a predictable timeline that helps patients achieve straight, healthy smiles. Your braces journey typically spans 18-24 months, though this varies based on your exact dental needs and treatment plan. Understanding each phase helps you prepare mentally and physically for what’s ahead.
Initial Consultation and Assessment
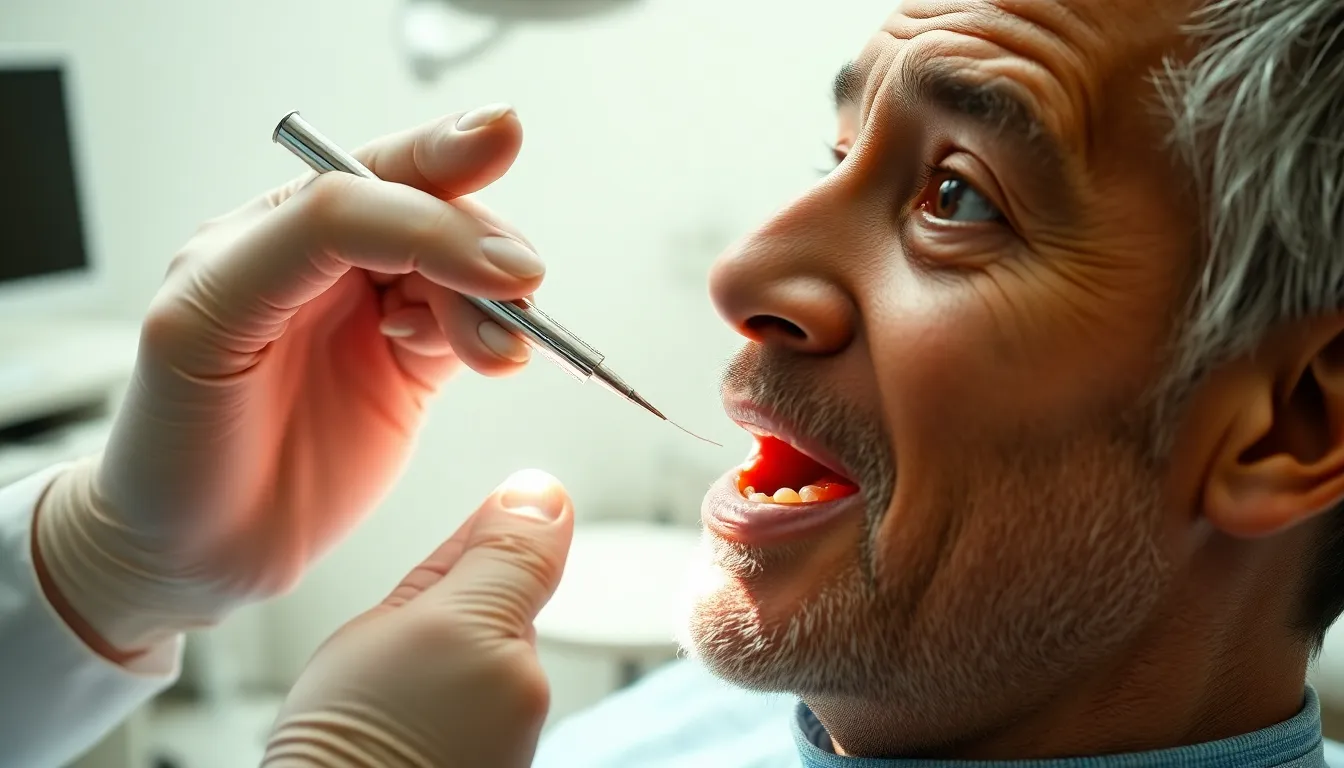
Your first appointment involves a comprehensive evaluation of your teeth, jaw, and bite. During this 60-90 minute assessment, your orthodontist takes X-rays, photographs, and discusses your smile goals. This consultation establishes the foundation for your personalized treatment plan. Sarah, one of our recent patients, shares: “I was nervous about my consultation, but Dr. Harris made me feel comfortable by explaining each step as he examined my teeth.”
Treatment Planning and Preparation
Following your assessment, your orthodontist creates a detailed treatment roadmap. This plan outlines the exact mechanics needed to move your teeth into ideal positions. Preparation for braces includes dental cleaning, addressing any existing cavities, and taking impressions or digital scans of your teeth. These precise records ensure your braces or aligners fit perfectly and achieve the desired results.
Braces Placement or Aligner Delivery
The actual braces placement appointment takes approximately 1-2 hours. Your orthodontist bonds brackets to each tooth and threads the archwire through them. For clear aligner patients, you’ll receive your first sets of aligners with detailed wearing instructions. Dr. Harris notes: “The placement appointment is actually quite straightforward—most patients are surprised by how quickly and comfortably we can get their braces on.”
Adjustment Appointments
Regular adjustment appointments occur every 4-8 weeks throughout your treatment. These 20-30 minute visits allow your orthodontist to monitor progress, replace wires or elastics, and make necessary modifications to your treatment plan. Each adjustment gradually shifts your teeth closer to their ideal positions. Clear aligner patients typically receive new sets of aligners and check-in less frequently, usually every 8-12 weeks.
Retention Phase
The retention phase begins after your braces are removed. This critical stage preserves your newly aligned smile through the use of retainers. Most patients wear retainers full-time for several months, then transition to nighttime wear indefinitely. Skipping this phase puts you at risk for teeth shifting back to their original positions, potentially undoing all your treatment progress.
Initial Consultation and Assessment
Your braces journey begins with an initial consultation at an orthodontist’s office. During this appointment, the orthodontist examines your teeth, gums, and bite to determine if braces are necessary and discusses available orthodontic options customized to your exact needs.
X-Rays and Dental Impressions
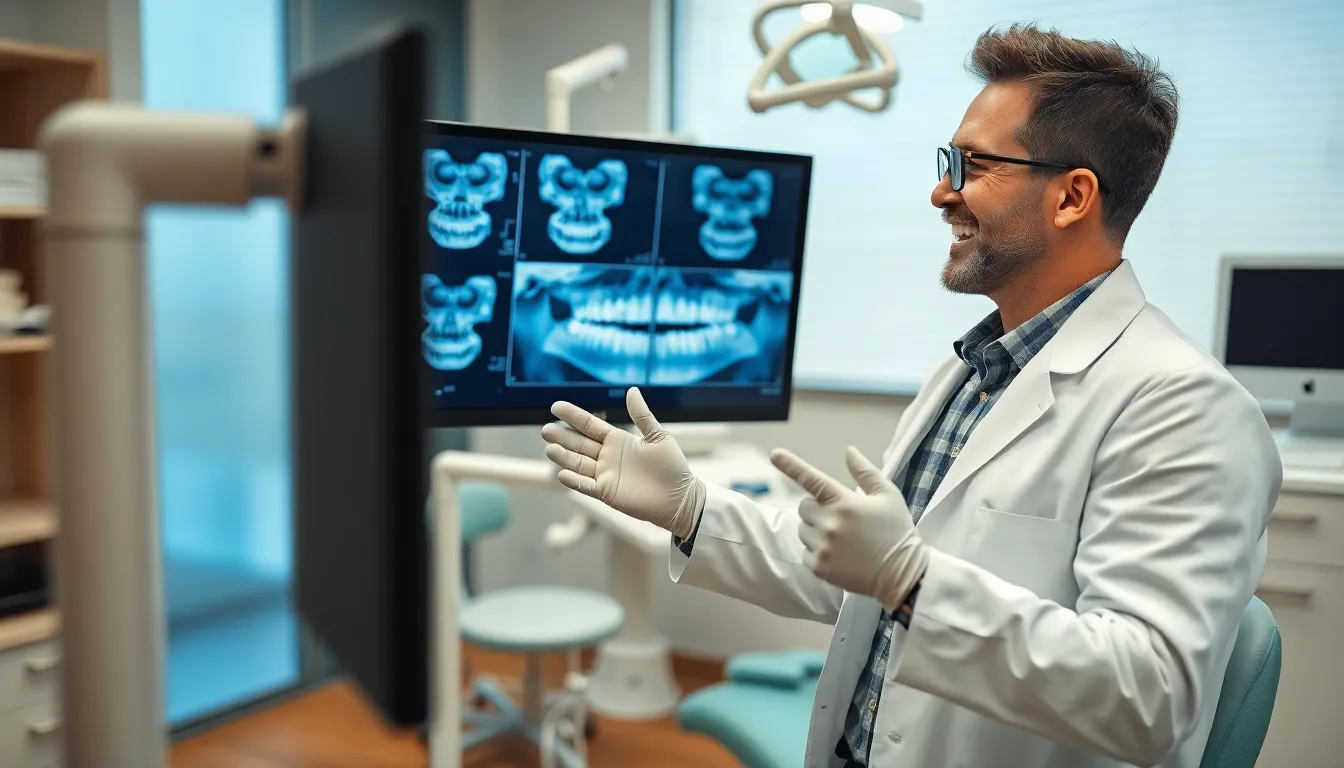
Comprehensive diagnostic records form the foundation of your orthodontic treatment plan. The orthodontist takes detailed X-rays to visualize the position of your teeth, roots, and jaw structure beneath the gums. These images reveal alignment issues not visible during a visual examination alone. Dental impressions or molds of your teeth are also created, providing a three-dimensional model that helps map out how your teeth will move throughout treatment. Modern orthodontic offices often use digital scanning technology instead of traditional putty impressions, making the process more comfortable and precise. These diagnostic tools allow your orthodontist to understand the unique characteristics of your mouth and develop a treatment approach that addresses your exact orthodontic needs.
Treatment Plan Discussion
After analyzing your records, your orthodontist presents a personalized treatment plan customized to your exact situation. This consultation covers several key elements: the type of braces best suited for you (traditional metal, ceramic, lingual, or clear aligners), estimated treatment duration, and anticipated outcomes. The orthodontist explains any preparatory procedures needed before braces placement, such as tooth extractions to create space or installation of palatal expanders to widen your jaw. Cost considerations, insurance coverage, and payment options are also typically discussed during this meeting.
One of our patients, Sarah, came in feeling anxious about getting braces at age 30, but after a thorough treatment plan discussion where we explained the discreet options available to her, she felt confident moving forward with ceramic braces. Dr. Todd B. Harris emphasizes that this consultation phase is crucial for setting realistic expectations and ensuring patients feel comfortable with their treatment path before proceeding.
Preparing for Braces Installation

Getting your teeth ready for braces involves several important steps to ensure successful treatment. Before the brackets and wires are attached, your orthodontist will complete exact preparations to create the foundation for your new smile.
Pre-Installation Dental Cleaning
A thorough dental cleaning is essential before braces installation to remove any plaque or tartar buildup on your teeth. This cleaning ensures the brackets will adhere properly to a clean tooth surface and helps prevent future dental issues during your orthodontic treatment. Your teeth must be completely dried after cleaning to create the ideal surface for the bonding adhesive. Many patients are surprised by how meticulous this cleaning process is, but it’s crucial for creating a strong bond that will last throughout your treatment.
“I always emphasize to my patients that the pre-installation cleaning is perhaps the most critical step in the entire process,” explains Dr. Todd B. Harris. “A clean tooth surface creates the perfect foundation for bracket placement and significantly reduces the risk of brackets coming loose during treatment.”
What to Eat Before Getting Braces
Consuming a balanced meal before your braces appointment helps prepare your body for the procedure. Focus on soft, nutritious foods that aren’t sticky or hard, as your teeth might feel sensitive after the installation. Yogurt, smoothies, mashed potatoes, and pasta are excellent options that provide sustenance without creating problems during the appointment. Avoid sugary foods or beverages that could leave residue on your teeth, potentially interfering with the bonding process.
It’s important to brush your teeth thoroughly before arriving at your appointment, but skip any oily or greasy foods that might leave a film on your teeth. Some patients find that taking a mild pain reliever about an hour before the appointment helps manage any discomfort during the procedure. One of our teen patients, Mia, shared that eating a banana smoothie before her appointment gave her just enough energy without making her feel uncomfortable during the two-hour installation process.
The Braces Installation Process
Getting braces installed follows a precise, methodical sequence executed by your orthodontist. The entire process typically takes place during a single appointment and involves several key steps to ensure proper placement and effectiveness of your orthodontic treatment.
Tooth Preparation and Conditioning
Your orthodontist begins by thoroughly cleaning your teeth to remove all plaque, tartar, and debris. This cleaning creates a pristine surface essential for strong bonding between your teeth and the brackets. Any residue left on your teeth can significantly weaken the adhesive bond, potentially causing brackets to detach during treatment. After cleaning, your teeth are dried completely and a conditioning gel is applied to roughen the enamel surface microscopically, creating tiny pores that help the adhesive grip better.
Dr. Todd B. Harris notes, “The preparation phase is critical for long-term success. I’ve seen many patients whose treatment was extended because brackets fell off due to improper initial preparation. Taking extra time during this step saves everyone frustration down the road.”
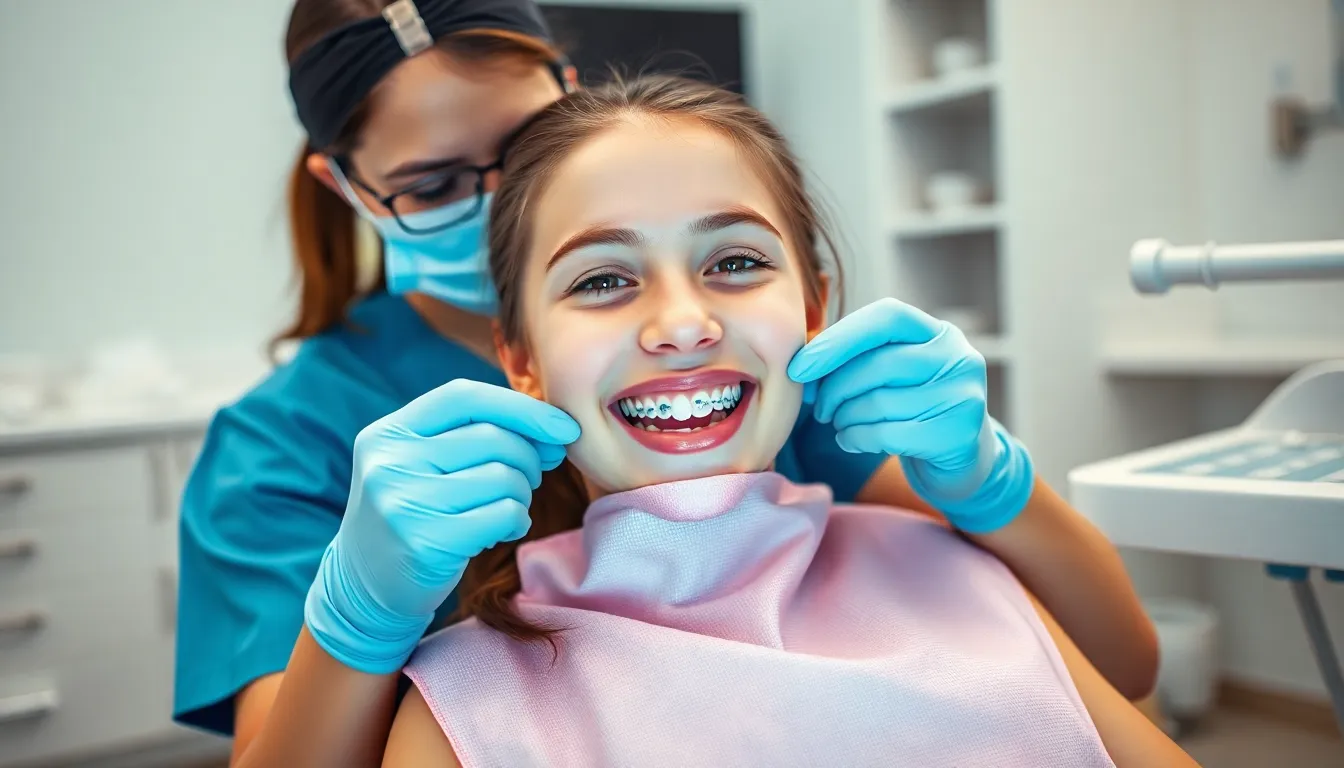
Bracket Placement and Wire Threading
Once your teeth are properly conditioned, your orthodontist applies special dental adhesive to each tooth. Individual brackets are then carefully positioned on your teeth using this bonding glue. Precision is paramount during this step – each bracket must be placed at exactly the right angle and position to achieve the desired tooth movement. A blue curing light hardens the adhesive, securing the brackets firmly to your teeth.
After all brackets are attached, your orthodontist threads a metal archwire through the slots in each bracket. This archwire provides the gentle, continuous pressure needed to gradually move your teeth into alignment. Small elastic bands or clips (called ligatures) secure the wire to each bracket. Some modern self-ligating braces don’t require these elastics, as they have built-in clips to hold the wire.
Sarah K., a recent braces patient, shared: “I was surprised by how methodical the bracket placement was. My orthodontist used a custom-made template to ensure each bracket was positioned perfectly. The whole process was fascinating to experience.”
Installation Timeline Expectations
The complete braces installation appointment typically lasts 1 to 2 hours. You’ll feel pressure during the procedure, but it shouldn’t be painful. Many orthodontists take photographs before and after installation to document your starting point. Mild discomfort and sensitivity are normal during the first 3-5 days as your mouth adjusts to the new appliances.
Your teeth may feel tender when chewing, and the brackets might irritate your cheeks and lips initially. Orthodontic wax, provided by your orthodontist, can cover any brackets causing irritation until your mouth adapts. Regular adjustment appointments will be scheduled every 4-8 weeks throughout your treatment, which typically spans 18-24 months depending on your exact orthodontic needs.
After Braces Are Installed

After your braces are installed, you’ll need regular orthodontic check-ups every 4-8 weeks for adjustments and progress monitoring. Your orthodontist will tighten the wires during these appointments to continue shifting your teeth into proper alignment over the treatment period of 1-3 years.
Managing Initial Discomfort
Mild soreness typically occurs during the first 3-5 days after braces installation or adjustment appointments. Over-the-counter pain relievers like ibuprofen or acetaminophen effectively manage this discomfort when taken as directed. Stick to soft foods such as yogurt, mashed potatoes, smoothies, and soups during this adjustment period to minimize irritation to your sensitive teeth and gums. Orthodontic wax becomes your best friend for preventing bracket-related irritation—simply apply a small amount to any brackets causing discomfort to create a smooth surface that won’t rub against your cheeks or lips. Warm salt water rinses (½ teaspoon salt in 8 ounces of warm water) help soothe irritated areas and promote faster healing of any small sores.
“I remember when Sarah, one of our teenage patients, came in for her first adjustment feeling anxious about the discomfort,” shares Dr. Todd B. Harris. “We recommended she create a ‘braces comfort kit’ with wax, pain relievers, and her favorite soft foods. She later told us this simple preparation made a tremendous difference in her comfort level during those first few days after adjustments.”
Oral Hygiene with New Braces
Brushing becomes even more critical with braces, requiring thorough cleaning after every meal to prevent food particles from becoming trapped. Angled orthodontic toothbrushes or electric toothbrushes with orthodontic heads clean around brackets and wires more effectively than standard toothbrushes. Interdental brushes reach spaces between brackets and under wires where regular brushes can’t access, removing plaque from these hard-to-reach areas. Flossing requires a different approach with braces—floss threaders or specialized orthodontic flossers help thread the floss beneath the wires to clean between teeth. Water flossers offer an excellent alternative for many patients, using pressurized water to remove debris without the manual dexterity needed for traditional flossing. Fluoride rinses provide additional protection against cavities during orthodontic treatment, strengthening enamel around brackets where decay risk increases.
Consistent oral hygiene prevents white spot lesions (early decay) that can appear around brackets and reduces the risk of gingivitis, which often develops during orthodontic treatment. Your orthodontist might recommend professional cleanings more frequently during your treatment to maintain optimal oral health and ensure your smile looks its best when the braces come off.
Adjusting to Life with Braces

Living with braces requires adapting to new sensations and care routines. The initial few days bring temporary discomfort as your mouth adjusts to the brackets and wires, but this typically subsides within a week. You’ll notice changes in speech patterns initially, though most patients adapt quickly and regain normal speech within days.
Dietary Modifications
Your food choices significantly impact both comfort and the integrity of your braces. Sticky foods like caramel and chewing gum can loosen brackets and should be avoided throughout your treatment. Hard foods including nuts, raw vegetables, and hard candies risk damaging the wires and brackets, so cutting these into smaller pieces or eliminating them entirely protects your orthodontic work. Soft foods such as yogurt, mashed potatoes, and soft fruits become ideal choices, especially during the days following adjustment appointments when teeth feel more sensitive. Limiting sugary foods reduces the risk of decay around brackets where plaque tends to accumulate.
Dr. Harris often shares, “One of my patients, Emma, created a ‘braces-friendly’ recipe book during her treatment, discovering creative ways to enjoy her favorite foods while protecting her braces. Her adaptability made her treatment experience much smoother.”
Essential Care Products
Maintaining optimal oral hygiene with braces demands specialized tools. Orthodontic toothbrushes featuring soft bristles and angled designs clean effectively around brackets and wires. Interdental brushes or floss threaders help remove food particles trapped between wires and teeth that regular brushing might miss. Fluoride mouthwash strengthens tooth enamel, providing additional protection against decay during treatment. Orthodontic wax serves as a comfort aid, covering any brackets or wires that irritate your cheeks or lips. Water flossers offer an excellent alternative for cleaning between teeth when traditional flossing proves challenging with braces. Carrying a travel-sized oral care kit ensures you can maintain cleanliness even when away from home.
Regular Orthodontist Visits
Regular orthodontist visits form the backbone of your braces treatment, typically occurring every 4-8 weeks throughout your orthodontic journey. These appointments ensure your teeth are moving correctly and allow your orthodontist to make necessary adjustments to achieve optimal results.
What Happens During Adjustments
Adjustment appointments are relatively quick sessions where your orthodontist checks your progress and makes modifications to your braces. During these visits, the orthodontist removes the elastic bands or ties that hold the archwire to your brackets, giving them an opportunity to examine how your teeth have shifted since your last appointment. They’ll then either tighten your existing archwire or replace it with a new one that applies the appropriate pressure needed to continue moving your teeth into alignment. These adjustments help gradually shift your teeth into their correct positions and address any discomfort or issues you might be experiencing with your braces.
“Many of my patients are surprised by how quick adjustment appointments actually are,” notes Dr. Todd B. Harris. “Most visits take just 20-30 minutes, though we always make time to answer questions and ensure comfort before sending patients on their way.”
Tracking Your Progress
Your orthodontist monitors your treatment progress through various methods during each visit. They visually examine your teeth and may take additional X-rays or 3D intraoral scans at exact intervals to ensure alignment is proceeding according to plan. Digital records allow orthodontists to compare current tooth positions against your initial scans, providing clear evidence of movement and helping to adjust treatment timelines if needed. The duration of braces treatment varies based on your individual dental needs, with most patients wearing braces for several months to a few years before achieving their desired results.
Conclusion
Getting braces is a groundbreaking journey that leads to a healthier more confident smile. While the process involves multiple steps from initial consultation to regular adjustments you’re now equipped with the knowledge to approach each phase with confidence.
Remember that temporary discomfort and lifestyle adjustments are small trade-offs for the long-term benefits of properly aligned teeth. With proper oral hygiene specialized care products and regular orthodontist visits you’ll navigate your braces experience successfully.
The 18-24 month timeline might seem long but each adjustment brings you closer to unveiling your new smile. Trust the process and your orthodontist’s expertise. Before you know it you’ll be showing off straight teeth and enjoying improved dental health for years to come.
Frequently Asked Questions
How long does the braces treatment typically last?
Braces treatment typically lasts 18-24 months, though this varies based on individual dental needs. Some patients may need treatment for only a few months, while others might require up to 3 years. Your orthodontist will provide a personalized timeline during your initial consultation based on your specific situation and treatment goals.
What happens during the initial orthodontic consultation?
During the initial consultation, your orthodontist will examine your teeth, gums, and bite, take X-rays and dental impressions, and discuss your smile goals. This comprehensive evaluation helps create a 3D model of your teeth and develop a customized treatment plan. The orthodontist will explain braces options, estimated treatment duration, and answer any questions you may have.
How should I prepare for getting braces installed?
Before getting braces, schedule a thorough dental cleaning to remove plaque and tartar, ensuring a strong bond for the brackets. Eat soft, nutritious foods before your appointment and avoid sticky or hard items. Maintain excellent oral hygiene leading up to installation day, and consider taking an over-the-counter pain reliever beforehand to minimize potential discomfort.
How long does the braces installation appointment take?
The braces installation appointment typically takes 1-2 hours. During this time, the orthodontist will clean and condition your teeth, apply adhesive to each tooth, carefully position the brackets, and thread the archwire through them. The process is not painful, though you may experience pressure during placement.
Will braces be painful?
Some discomfort is normal during the first few days after braces installation and following adjustment appointments. This typically feels like pressure or soreness rather than sharp pain. Over-the-counter pain relievers like ibuprofen can help manage this discomfort. Orthodontic wax can also be applied to brackets that cause irritation to the inner cheeks or lips.
How often will I need to visit the orthodontist for adjustments?
You’ll need to visit your orthodontist every 4-8 weeks for adjustments throughout your treatment. These appointments are essential for monitoring progress and ensuring your teeth continue moving into proper alignment. Adjustment visits are relatively quick, usually lasting 20-30 minutes, and allow the orthodontist to tighten wires or replace elastic bands.
What foods should I avoid with braces?
Avoid hard foods (nuts, ice, hard candies), sticky foods (caramel, taffy, gum), and chewy foods (bagels, tough meats) that can damage brackets or wires. Also avoid biting directly into foods like corn on the cob, apples, or carrots. Instead, cut these foods into small pieces. Foods high in sugar should be limited to prevent plaque buildup around brackets.
How do I properly clean my teeth with braces?
Clean your teeth with braces by brushing after every meal using an orthodontic toothbrush or electric toothbrush with soft bristles. Use interdental brushes to clean between brackets and under wires. Floss daily with a floss threader or water flosser. Rinse with fluoride mouthwash to help prevent cavities and white spots around brackets.
What should I do if a bracket breaks or wire comes loose?
If a bracket breaks or wire comes loose, contact your orthodontist immediately to schedule a repair appointment. In the meantime, apply orthodontic wax to any sharp edges causing irritation. If a wire is poking your cheek, try gently pushing it flat with a pencil eraser or cotton swab. Don’t try to fix broken components yourself.
What happens after braces are removed?
After braces removal, you’ll enter the retention phase where you’ll wear retainers to maintain your new alignment. Initially, you may need to wear retainers full-time, eventually transitioning to nighttime wear only. Regular check-ups will continue to monitor stability. Without proper retainer use, teeth can shift back to their original positions, potentially requiring retreatment.